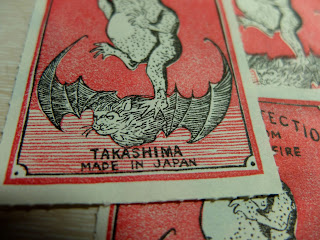
The block print was started from China, and it's somehow transferred to Japan. I can't deny that they use well with various colors combination. Vintage Japanese matchbox labels were with interesting images. There's a vermeil set label. I chose the frog ambassador.
這圖案唯一麻煩的地方是身上那斑斑點點,描圖時就已感到煩躁,搬上橡皮後,更是麻煩;所幸圖案的好處就是可以隨心所意地改變斑點位置,且並不會影響整體感。
The troublesome matter of this stamp is spots. I was kind of impatient when I transferred this image to tracing paper. But it's more annoying when I carved it on rubber stamp. Fortunately, I could change the spots place and it won't change the whole image.
沒套上顏色感覺戲劇張力不夠。 Without the background, it's no intensity.

以下的教學試用於,四方形的套色組合,或是體積較大不易對準的的印章。
This tutorial is suitable for square stamp or large stamp that you can't make great alignment.
準備物品 you will need:
印章組 stamps
印台 ink pad
描圖紙 tracing paper
紙 paper
定位器 stamp positioner
(可自製亦可至商店購買 The stamp positioner, you can buy it in store or diy an easy one.)
Step1
先蓋上底色
Stamp the background first.
(個人習慣: 先蓋上較淺的顏色,以防印章沾染深色線條,影響線條表現及印章本體。)
(I'd like to stamp light color first then dark outline. It won't influence the outline color and stain stamp as well.)
Step2
描圖紙左上角先對準輔助器,再將線條蓋在描圖紙上
Align the upper left conner with stamp positioner, then stamp on tracing paper.
Step3
將已蓋上線條的描圖紙對準蓋好的背景上,確定位置後再將輔助器對齊其位置
Align the tracing paper with background, then put your positioner on the right spot.
將描圖紙移除,再把印章對齊輔助器,蓋下去
Remove the tracing paper, then stamp the outline stamp by aligning the positioner.
Step5
記得邊邊要貼齊,才不會蓋歪
It must be along the positioner, otherwise it won't be "right place."
Voilà
小心火燭
Protection from Fire.
size: 56x75mm


No comments:
Post a Comment